Sashiko

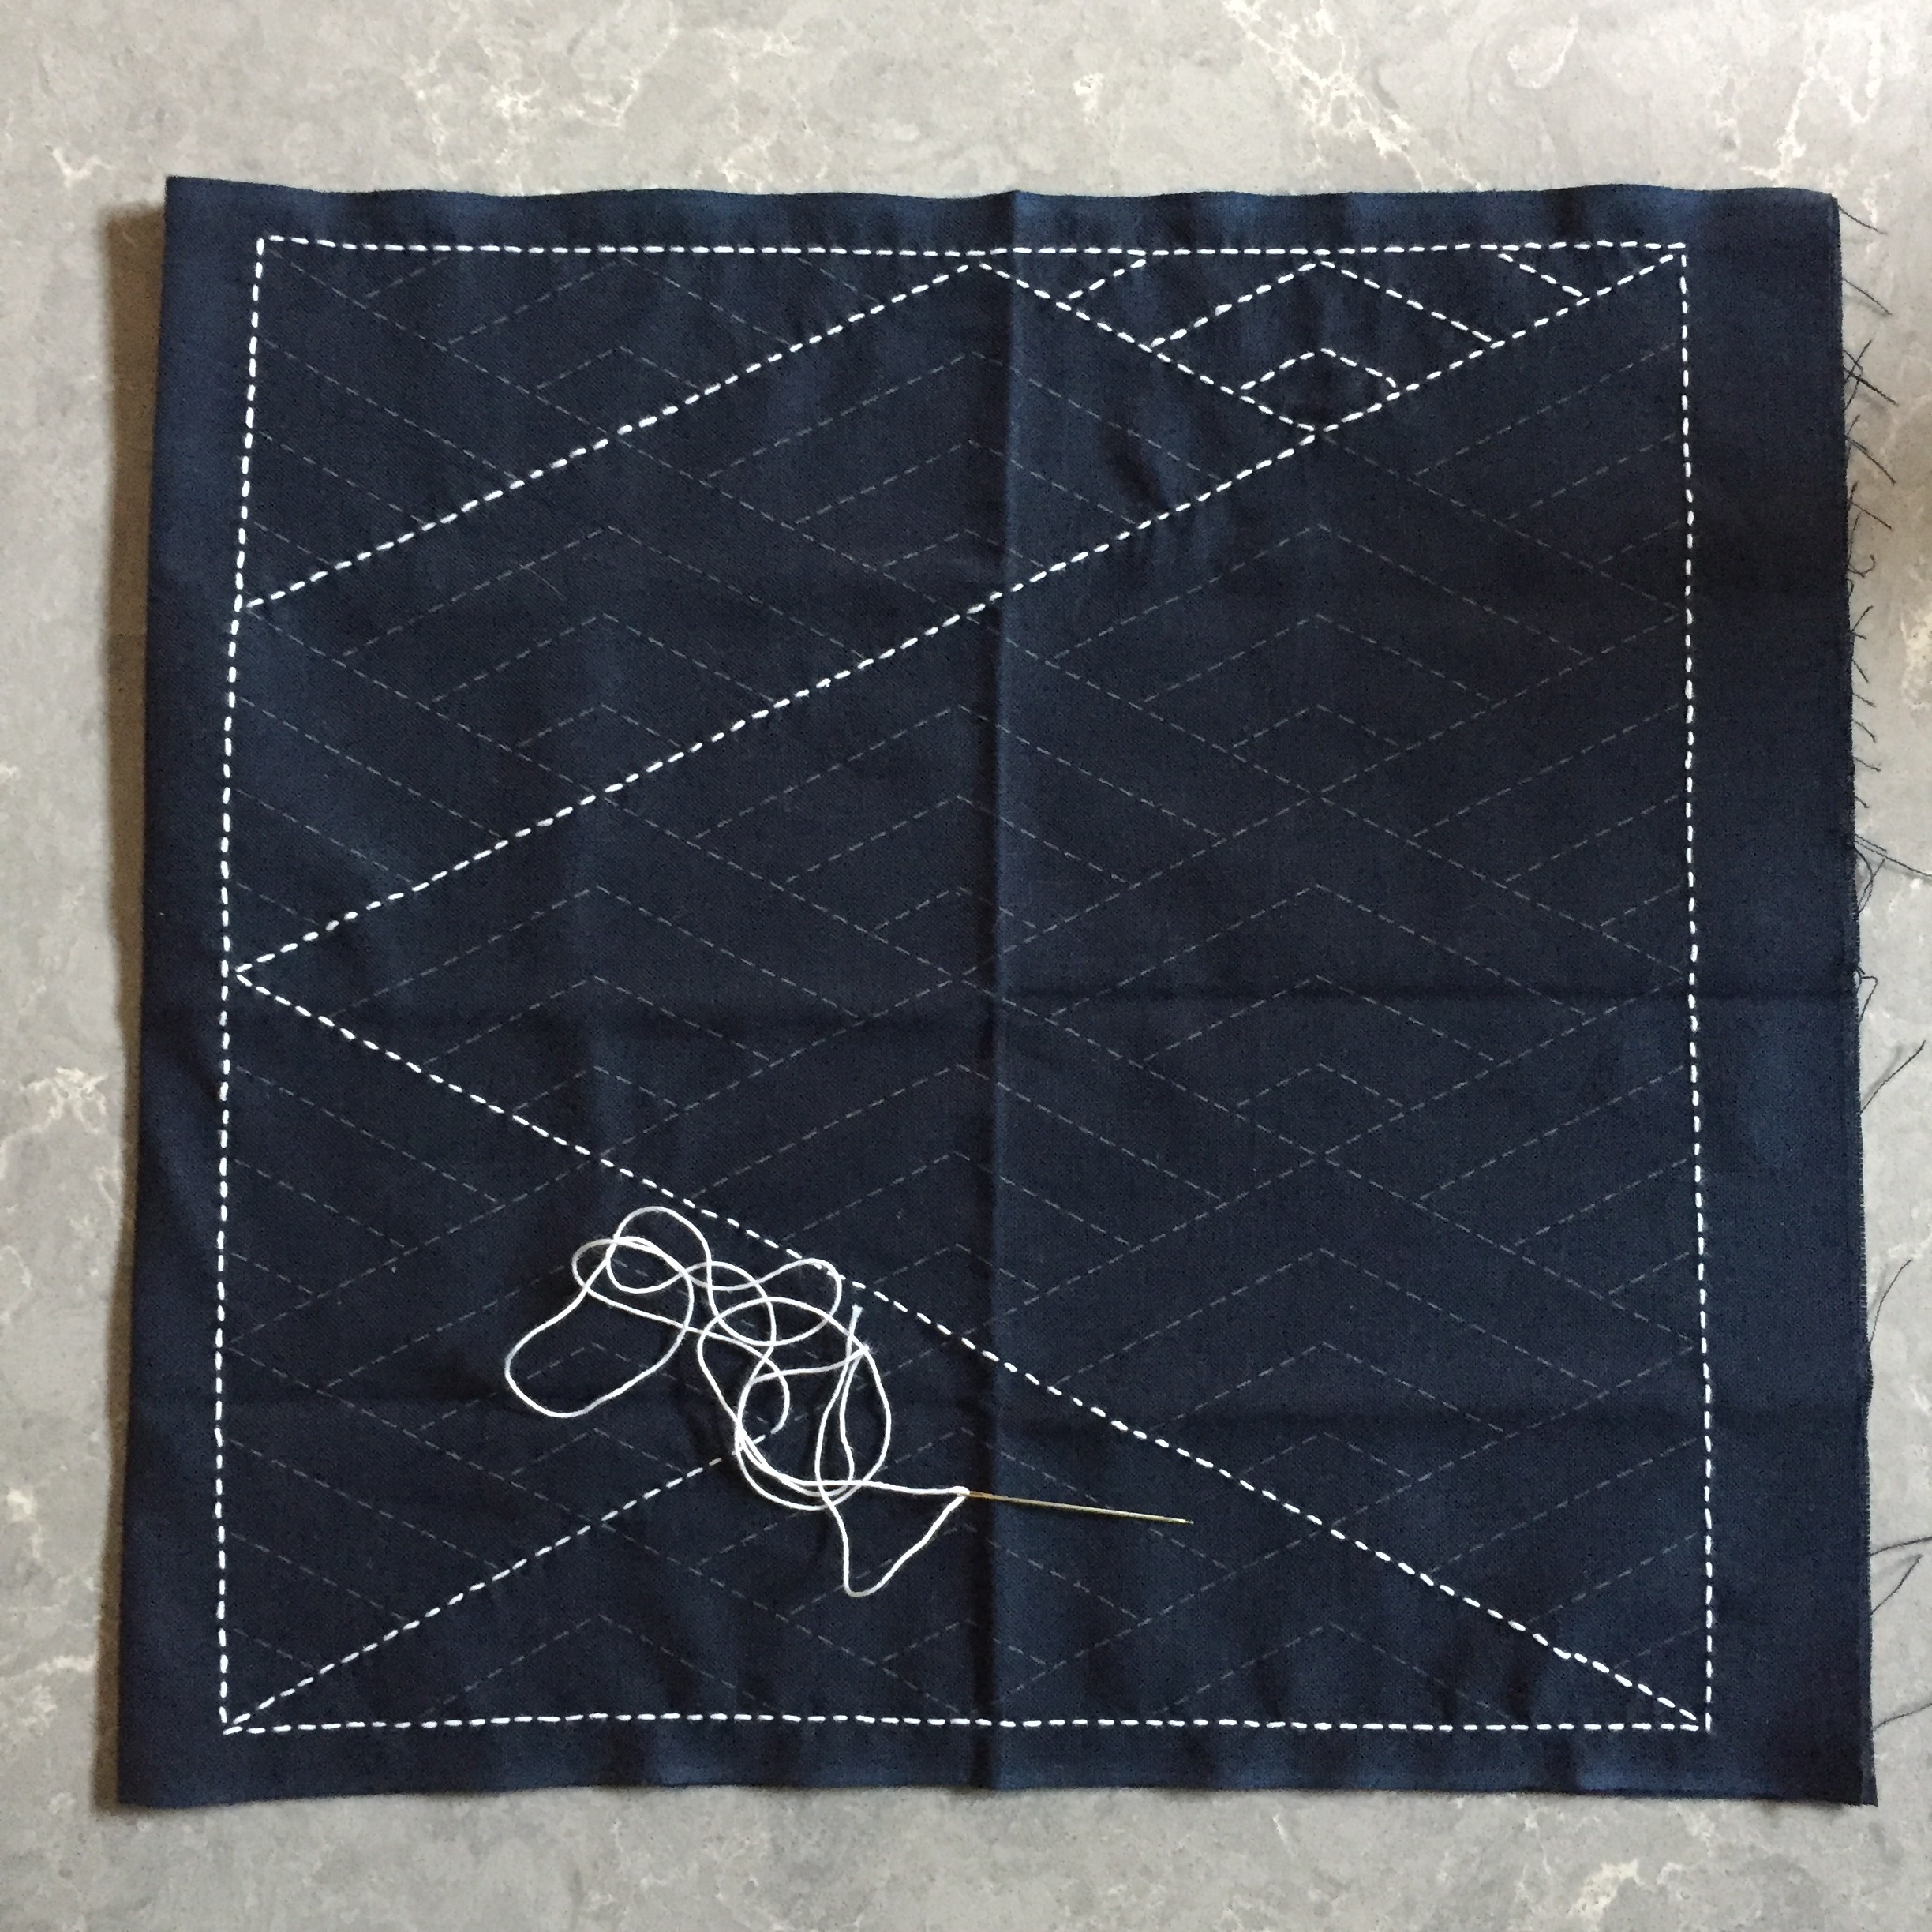
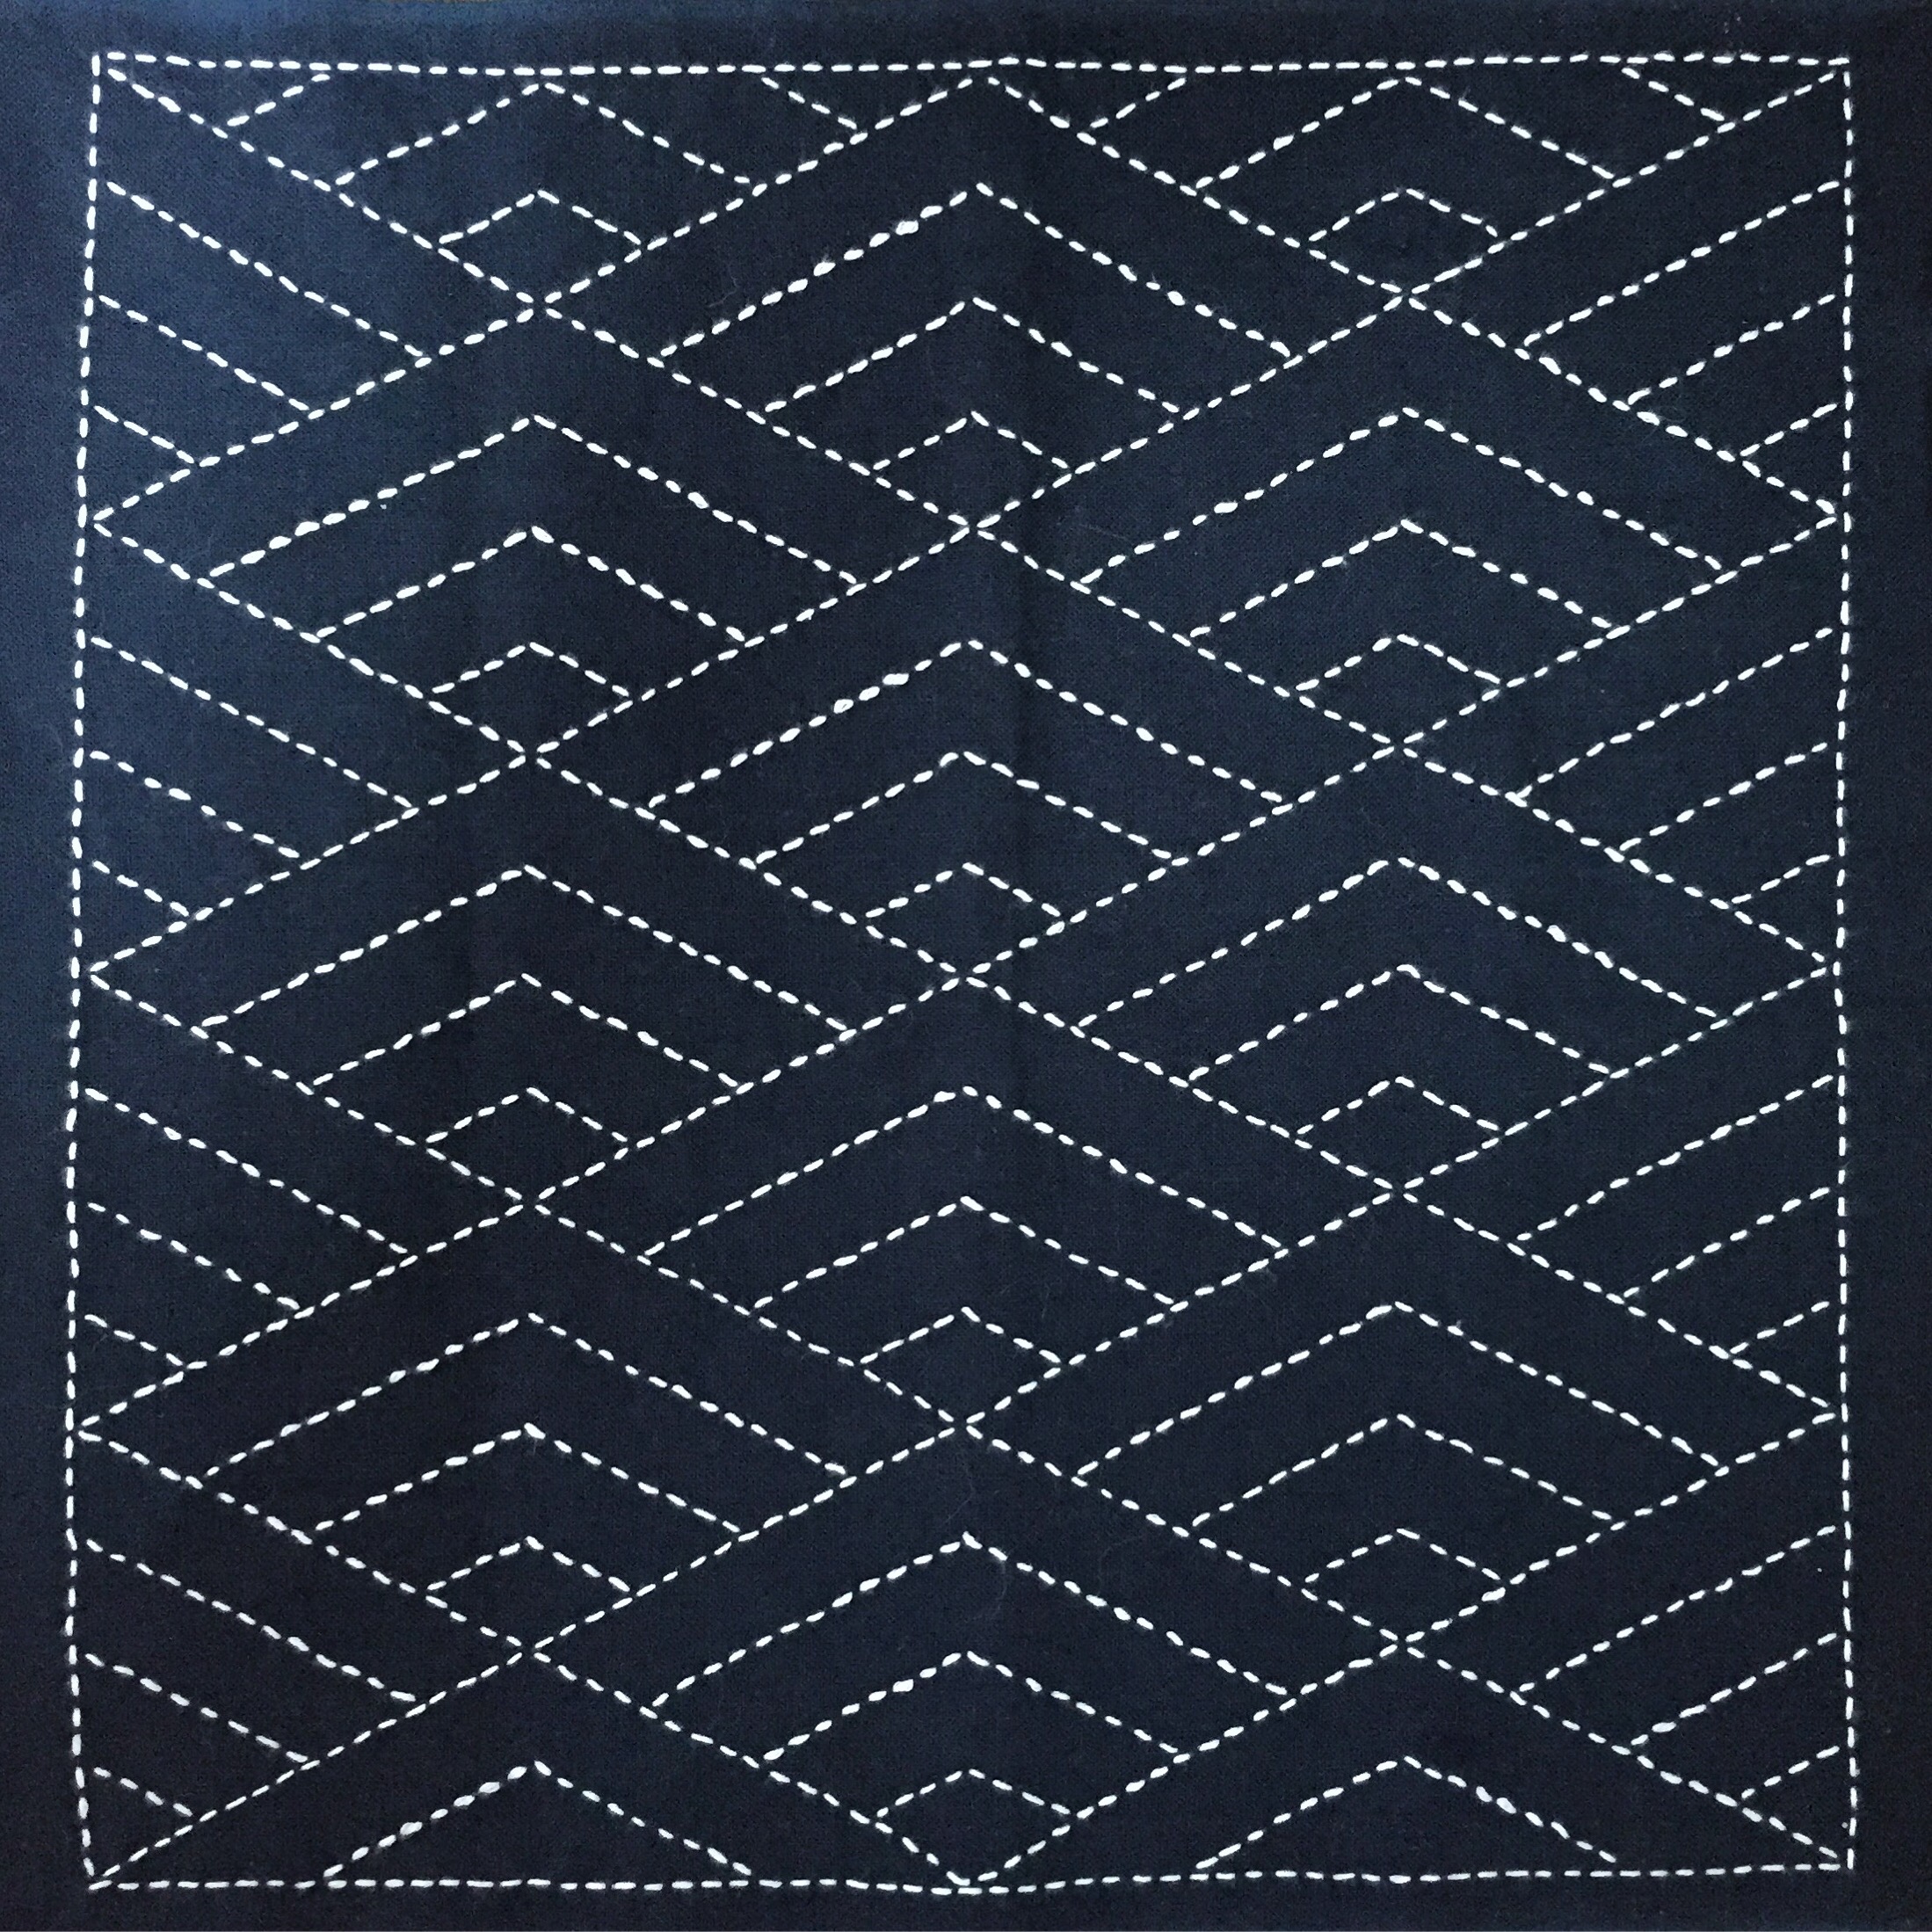
I finally tried sashiko and I love stitching it as much as I love the navy and white designs. I’ve been wanting to try it for quite a while, so when I found a vendor selling kits at the Quilt Expo last weekend I knew it was finally time to start. The vendor had a gorgeous sashiko sampler quilt made up of square blue panels from various kits. I got the kit above (kits include fabric pre-marked with chalk and instructions in Japanese) and my sister bought three more to give me at Christmas. I plan to make a wall hanging quilt with the four panels. 

I found sashiko to be very quick to learn and very calming. It didn’t take me very long to get the hang of loading up my needle with multiple stitches and once I did the panel was finished in no time. I find it necessary to embrace imperfection and character (in fact, I’m drawn to it more the older I get) with sashiko as the thread is thick and it’s hard to get consistent stitches (the fabric isn’t counted like in cross stitch or blackwork). I can’t wait to stitch some more!

~L

Sunflower quilt

IMG_6229

I just finished this sunflower quilt for my mother-in-law and I’m quite happy with how it turned out.  I made the pattern based on a few barn quilt designs.

I used reproduction Civil War era fabrics to piece the front along with my favorite cream Kona solid, and the backing and binding fabrics are from Joann’s. This was my first time quilting with a walking foot and I’m hooked; there are zero puckers on the back!  I rolled both sides as I was quilting and it really reduced bulk, kept the fabric I was quilting nice and flat, and helped keep the lines straight.  It took me a while to quilt though, since I had to walk away from the machine and reroll the quilt every time I finished a line.

IMG_6247

I made a little tag and added care instructions on the back.

IMG_6219

~L

Quilted pillow cover

IMG_5736

I have been obsessed with fabrics and quilting lately and yesterday I made this quilted pillow cover instead of studying for the ESL Praxis exam.  This week is the first week I’ve truly had off since winter break and I really needed to take some time and make something for myself.  I knew I wanted to make a simple quilted pillow cover and thought this pale gray ikat fabric I picked up at last fall’s Quilt Expo would be perfect.  I’m really happy with how it turned out.

I had never made a sawtooth star block before but I found this tutorial by Sew Mama Sew to be extremely helpful (I used the instructions for the 12″ star).  I used the instructions from Crazy Mom Quilts to make the envelope backing and I will continue to make pillow backs this way; doubling the envelope layers makes the back much sturdier.

I love how this pillow looks with the quilt that my husband’s aunt made us and so does our little girl cat!

IMG_5741

~L

Retro Plaid Quilt

IMG_5722

Last Friday was the last day of high school and my last day student teaching.  I wanted to do something special for my amazing CT so I decided–on Wednesday–to make her a quilt.  That gave me Wednesday night and Thursday night to do everything from selecting fabric to sewing the binding.  I had been eyeing Suzy Quilts’s Retro Plaid Quilt pattern and realized it was perfect: cheerful, modern, and doable.  I took a little road trip to Patches and Petals, an adorable quilt shop in Belleville, and found the perfect fabrics.  I cut and pieced the top on Wednesday night and quilted and sewed on the binding on Thursday night.  I didn’t get a lot of sleep those two days, but I finished!  I wish I would have had time to hand stitch the binding (it’s my favorite part of quilting!), but the machine stitched binding turned out ok.  I need to get a walking foot for quilting because the back has a few puckers, but I’m quite happy with how my two day quilt turned out.

IMG_5721

~L

Finished! Blackwork sampler

IMG_4959.JPG

I finished my blackwork sampler and exhibited it in the annual EGA show a few weekends ago. Mine is in the center. I modified the pattern a bit and included new text, which is the question Benjamin Franklin asked himself every morning. I love that no two pieces turned out the same even though we all started with the same pattern.

~ L

Laptop sleeve and adventures in quilting

FullSizeRender

We haven’t updated our blog in a few  months, but we have been busy making things!  I started grad school at the University of Wisconsin-Madison in June and have a few more days before school (and student teaching) starts back up again, so I wanted to share what I’ve been working on…before things like sleep and free time are luxuries.

Yesterday, I made this laptop sleeve for my new laptop.  I followed the excellent instructions here and I’m so happy with the results.  I made a few modifications to the pattern: I moved the opening to one of the short sides and I added batting, velcro, and a decorative button.  Joann’s had a sale on fabric and I used my educator discount, so I’d estimate the total cost to be about $10-$15.  The lining fabric makes me so happy:

image1

x x x

Earlier this summer I made my first quilted project, a table runner:

image3

Many (most) of the seams don’t line up and I struggled sewing straight lines and being consistent with seam allowances (I truly only just learned how because I’ve done a lot of sewing this past week), but I really enjoyed making it (especially hand sewing the binding!).  I had a lot of help from my Aunt Debbie who is a great teacher and reminded me that making quilts are fun and that imperfections are charming.

x x x

Finally, as part of my graduate program I worked at a community center this summer with kids aged 5-16.  We were encouraged to develop craft projects and when I found a box full of fabric in the supply room I had the brilliant idea to make an appliqué quilt with a bunch of little kids.  I took the fabric home, ironed it, and cut the larger pieces into 8.5″ squares.  Then I stitched up a sample square; laid out fabric scraps, embroidery floss, beads, and fabric markers; taught the kids how to make a quilter’s knot and sew a running stitch; and told them to go for it!

image2

When the patches were finished I took them all home and sewed them together, added batting and a backing, quilted it (I simply stitched in the ditch on the horizontal lines), and  finished with a self-binding.

IMG_4367

It was so much fun…but…there were a lot of missing needles and pins by the end of the project and a few kids started, but didn’t finish their patches, leaving me and another student teacher with extra hand stitching.  For example, a young girl carefully cut out Wonder Woman from a flannel sheet and pinned it on a square and asked me to sew it on.  Of course, I had to add a few beads and French knots for fun!  A few kids decided that they were going to keep their patches because they liked them so much, so they didn’t end up on the quilt.  Overall though, I’m thrilled with the final project.

~L


My first calligraphy workshop

Today was such a lovely day!  I got up early (yeah, yeah. Lame for a Saturday…), met a friend for coffee, and then drove to the city. I should mention that I hate the city. Going by myself was not lovely.  BUT!  It was worth it!

I attended a beginners copperplate calligraphy class by Bianca Mascorro.  It was so nice to have someone provide supplies, explanations, and feedback in person. I was using the wrong paper for practice, learned how far in my nib should be set in the flange, got to try an awesome black ink (Moon Palace Sumi), and wrote the alphabet for the first time!  

Here are some pics from class and some practice after I got home:


So much more to learn and practice, but so fun!

~C

The wait is over!

It’s been about 7 weeks since my last post about wanting to learn calligraphy.  I finally gave up on the hope that my beginners kit was ever going to come.  In that time I had learned so much about it from Instagram and Periscopes, that I felt confident in being able to choose the materials I needed as a newbie.  Which I did!  And they arrived this week!  I also had plenty of time to buy a desk, chair, and a few other little knick-knacks for my desk.  So here we go….

IMG_1604

Custom dinky dip holder by Fox + Quills

IMG_1758

I purchased the oblique holder, nibs, ink, and book from Paper & Ink Arts.  (Mastering Copperplate Calligraphy by Eleanor Winters, walnut ink, Nikko G nib, basic oblique holder.

Image-1

Guidesheets by Bianca Mascorro.  I’ve signed up for a beginners class of her’s next weekend!  So nervous!

It’s harder than it looks.  Maybe I make it look like it’s hard….that’s because it is.  You thought you knew how to draw a straight line, huh?  YOU DON’T.

This is going to be so fun 🙂

~C